In this article, I’ll go over how to start doing web challenges in capture-the-flag (CTF) competitions from the ground up. This is adapted from a talk I gave at MasonCC, the cybersecurity club at George Mason University.
What is “Web”?
When someone says web, they really just mean communication between a web server and a web client (such as a web browser). There are many different web servers commonly used on the internet, including:
- Apache HTTPd
- Nginx (“Engine X”)
- Lighttpd (“Lighty”)
- Microsoft IIS
- Caddy
- Tomcat
- Jetty
- OpenResty
- and many others…
Web servers will serve clients with content that generally falls into two categories: static content and dynamic content.
Static content consists of static files such as raw HTML files, JavaScript, CSS, and images. For CTFs, this is generally pretty boring. In easy challenges, you might find a flag in the HTML of a static site or a static JavaScript file, but this is less common in harder challenges. Actual exploitation will generally be limited to the web server itself and its configuration.
Dynamic content is what most CTF problems will focus on. Dynamic content can be created using languages/frameworks like PHP, Flask, Django, Ruby on Rails, Struts, Node.js, and ASP.NET. These web applications will usually rely on some kind of backend server that hosts an interface that the web server can communicate with to exchange requests and responses. These interfaces can be reverse proxies to an additional internal web server or communicate directly to a program that implements an interface like CGI, FastCGI, or WSGI. That is where the backend code will be running and processing requests. Dynamic content will also usually rely on a database, which is used to store dynamic information. Unlike a request for static content which won’t change, dynamic content may differ between each request. This is what we attack! Dynamic content opens up opportunities to exploit all the different interconnections between a web server, backend code, and databases.
Exploiting dynamic content will often rely on understanding the backend programming language. I highly recommend learning the basics of SQL and backend languages like PHP, Python, and Java.
Databases
Databases are used by web applications to store persistent information. The specific software used to create and serve a database is called a /database management system or DBMS. There are a few different categories of databases. However, relational databases are the most common.
Relational databases (RDBMS) are the traditional style of database. They use separate rigidly-defined tables to store information, each of which will consist of rows and columns, like a spreadsheet. Columns are defined beforehand when a table is created and will consist of a name, type, and other optional properties. To interface with an RDBMS, a language called Structured Query Language (SQL) is used.
Common relational DBMSs include:
- MySQL
- MariaDB
- Postgres
- Microsoft SQL Server (MSSQL)
- SQLite
NoSQL databases are unlike traditional relational databases. Rather than using a rigidly defined structure, they are loosely defined and modifiable. Tables don’t need to have a defined set of columns to store individual pieces of information. Instead, each element inside the table can contain fields and subfields that may not exist on other elements in the table. What qualifies as a NoSQL database is a lot vaguer than RDBMSs, but MongoDB is probably the most popular NoSQL database and its concepts can be loosely applied to the other existing NoSQL databases. In MongoDB, tables are called collections, and each collection consists of documents, rather than rows. Instead of defining columns for each collection, each individual document can define its own fields. MongoDB uses a format similar to JSON. Rather than writing SQL queries, documents and collections are generally accessed through libraries called drivers.
Common NoSQL databases include:
- MongoDB
- Apache Cassandra
- Apache CouchDB
- Couchbase Server
- Amazon DocumentDB
Key-value databases are often considered a subset of NoSQL databases and the line between the two is blurry. They act as associative arrays, storing keys that point to values. You can consider them associative arrays, acting like hash maps or dictionaries. These are generally used for storing simpler data compared to relational and NoSQL databases. Many key-value databases store everything at the root level, there is no organization into collections or tables. You simply request a key from the database and it gives you the associated value. Key-value databases often store data in memory and are used for caching and volatile data storage.
Common key-value databases include:
- Redis
- LevelDB
- Memcached
- Apache Ignite
- Amazon DynamoDB
SQL Primer
Since most databases you encounter will be relational, you’ll frequently run into SQL when solving web exploitation problems. SQL queries are used to get information from a database, insert new information, update existing information, or delete information.
Keywords
SQL has keywords you use to perform these actions. Some of these are described in the following table:
| Keyword | Action |
|---|---|
| SELECT | retrieves rows from a table |
| INSERT | adds new rows to a table |
| UPDATE | edits existing rows in a table |
| DELETE | deletes rows from a table |
| CREATE | creates a new table in a database |
| ALTER | edits the columns in a table |
| DROP | removes a table, column, constraint, database |
When using these keywords to build statements, the FROM keyword is used to specify which table is being targeted.
Conditions
When using most of these keywords, you can specify conditions. The condition part of a statement will start with WHERE, usually followed by the column name to compare to. It can include some of the condition types described in the following table:
| Condition | Action |
|---|---|
| = | equals |
| <> (or !=) | doesn’t equal |
| > | greater than |
| >= | greater than or equal |
| < | less than |
| <= | less than or equal |
| LIKE | search for a patterns using the % wildcard |
Examples
Select a user in the users table with the email [email protected]:
1
2
SELECT * FROM users
WHERE email = '[email protected]'
Select all the users in the users table and only return the name and address columns:
1
SELECT name, address FROM users
Update the name of the [email protected] user to John Doe:
1
2
3
UPDATE users
SET name = 'John Doe'
WHERE email = '[email protected]'
Insert a new user into the users table:
1
2
INSERT INTO users (name, email, address)
VALUES ('Jane Doe', '[email protected]', '123 Main St')
Delete all users with emails ending in @example.com:
1
2
DELETE FROM users
WHERE email LIKE '%@example.com'
Web Concepts
There are various web concepts and features you should know that are often a part of CTF problems.
URL
Before diving deeper into web exploitation, it’s important to understand the anatomy of a URL.
 From https://developer.mozilla.org/en-US/docs/Learn/Common_questions/What_is_a_URL
The scheme tells the browser what protocol will be used to handle the request. Common values for this include http, https, ftp, ws, wss, blob, data, file, git, mailto, and tel.
The domain name is the server that receives the request. The domain can be an actual domain name or an IP address in IPv4 or IPv6 format. IPv4 addresses are formatted in their standard way, for example https://192.0.2.103:8443. IPV6 addresses are specified in brackets with an optional port outside of the closing bracket, for example https://[2001:db8:56:ed33::121]:8443. If you need to specify the zone ID to force the browser to use a specific interface, such as when using IPv6 link-local addresses, add a % at the end of the IP followed by the zone ID. For example, https://[2001:db8:56:ed33::121%eth0]:8443 or https://[2001:db8:56:ed33::121%14]:8443
The port is optional. If a port is not provided, the default port for the scheme is used.
The path specifies which resource is being accessed.
The parameters, often called URL parameters or GET parameters, are additional parameters sent to the webserver to provide context when accessing the requested path. The set of parameters starts with a ? and then they are listed in key=value format with a & separating each pair.
The anchor, also called the fragment, is a reference to a part of the webpage. Anchors will often scroll the browser window down to the corresponding anchor tag. The anchor is not sent to the server; it is only ever processed in the browser.
Request and Response
The request and response cycle is how web clients and servers actually send data between each other. When you browse to a page, a request is sent from your web browser to the web server which replies with a response, usually the page you requested.
Request
Let’s take a look at a request to GMU’s Blackboard site that was sent using a pretty standard install of Google Chrome.
1
2
3
4
5
6
7
8
9
10
11
12
13
14
15
16
GET / HTTP/1.1
Host: mymasonportal.gmu.edu
Connection: keep-alive
sec-ch-ua: " Not A;Brand";v="99", "Chromium";v="99", "Google Chrome";v="99"
sec-ch-ua-mobile: ?0
sec-ch-ua-platform: "Windows"
DNT: 1
Upgrade-Insecure-Requests: 1
User-Agent: Mozilla/5.0 (Windows NT 10.0; Win64; x64) AppleWebKit/537.36 (KHTML, like Gecko) Chrome/99.0.4844.74 Safari/537.36
Accept: text/html,application/xhtml+xml,application/xml;q=0.9,image/avif,image/webp,image/apng,*/*;q=0.8,application/signed-exchange;v=b3;q=0.9
Sec-Fetch-Site: none
Sec-Fetch-Mode: navigate
Sec-Fetch-User: ?1
Sec-Fetch-Dest: document
Accept-Encoding: gzip, deflate, br
Accept-Language: en-US,en;q=0.9
In the first line, the request is asking for the root page / using a GET request and the HTTP/1.1 protocol. The host is set to mymasonportal.gmu.edu which tells the web server which site is being requested (see Virtual Hosts). While these are the default headers sent, keep in mind that you can add, remove, or modify the headers. You are in full control of what data is sent by your web browser. In CTFs, changing request headers may be part of the challenge in order to exploit the server or access hidden content. For example, changing the host header may allow you to access a hidden website, changing a data header may allow you to perform SQL injection, changing the HTTP verb may allow you to get around request blocks, or changing authentication headers may allow you to access restricted resources.
Response
Now let’s take a look at the response sent from the Blackboard server in response to our above request.
1
2
3
4
5
6
7
8
9
10
11
12
13
14
15
16
17
18
19
20
21
22
23
24
25
26
27
HTTP/1.1 200
Cache-Control: private
Cache-Control: max-age=0
Cache-Control: no-store
Cache-Control: must-revalidate
Cache-control: no-cache="set-cookie"
Content-Encoding: gzip
Content-Language: en-US
Content-Security-Policy: frame-ancestors 'self' https://*.gmu.edu
Content-Type: text/html;charset=UTF-8
Date: Wed, 23 Mar 2022 07:49:46 GMT
Expires: Tue, 23 Mar 2021 07:49:46 GMT
Last-Modified: Sat, 23 Mar 2002 08:49:46 GMT
P3P: CP="CAO PSA OUR"
Pragma: private
Server: openresty/1.15.8.3
Set-Cookie: JSESSIONID=2B89354BE54AA52D9353D5EA2DE03519; Path=/; Secure
Set-Cookie: BbRouter=expires:1648032586,id:87FB35BCAFDFD66FB08F3E8967845177,signature:47d490e38737e972fdf73437e1cc1668a6135ad3e6a86376893abc0c9b1e260e,site:36be7d39-f2b0-496a-b106-351c31777886,v:2,xsrf:d916660b-9e03-4abc-8b0e-ed5d6409545c; Path=/; Secure; HttpOnly
Set-Cookie: AWSELB=D533E5B9129ED89D5FA321F1E5DF2890EA386A576CFFBC4D1BD316B6C5CA22375F77FAD4BE9378D468758EA4F42F4DDEEB03DF725107F5959074293BB7E23FA0A492F71913;PATH=/;MAX-AGE=900
Set-Cookie: AWSELBCORS=D533E5B9129ED89D5FA321F1E5DF2890EA386A576CFFBC4D1BD316B6C5CA22375F77FAD4BE9378D468758EA4F42F4DDEEB03DF725107F5959074293BB7E23FA0A492F71913;PATH=/;MAX-AGE=900;SECURE;SAMESITE=None
vary: accept-encoding
X-Blackboard-appserver: ip-10-145-62-15.ec2.internal
X-Blackboard-product: Blackboard Learn ™ 3900.34.0-rel.51+f0d11c8
X-Frame-Options: SAMEORIGIN
X-XSS-Protection: 1
Content-Length: 19530
Connection: keep-alive
You can find a lot of information about a web server by looking at its response headers. The first line shows that the HTTP/1.1 protocol was used and that the status was 200 (OK). The Server header shows that it’s using the OpenResty web server and even gives the full version number. This is extremely useful when searching for CVEs or other vulnerabilities in web servers. The Set-Cookie header shows which cookies are being set, as well as if the Secure or HttpOnly flags are being set. It also shows that the site is using AWS Elastic Load Balancing. The custom X-Blackboard headers reveal the internal IP address of the web server and the fact that it’s being hosted on Amazon EC2. They also show the exact version of the software.
Headers
So what do all of these headers do? Headers are sent in every request and response between the web browser and server. They describe information or metadata about the HTTP request/response. In addition to the predefined HTTP headers, web servers and applications can also implement custom headers. Headers starting with X- are generally custom HTTP headers, although some headers started as custom headers but were adopted as part of the standards and retained their X- for backward compatibility, such as X-Frame-Options.
The HTTP headers page in the Mozilla documentation is a great source for information about what all the different HTTP headers do. Rather than repeating effort, I will just refer you there.
Methods/Verbs
HTTP methods, often called verbs, are the action specified in a request. For example, the GET method asks for a resource and the DELETE method asks for a resource to be deleted.
List of HTTP Methods/Verbs
| Method | Action |
|---|---|
| GET | Requests a specified resource. It should never modify a resource. Think of it as a read-only method. |
| HEAD | Like a GET request but only asks for the HTTP headers; the web server will not return anything in the response body. |
| POST | Submits data to a web server which may cause a change, such as modifying a row in a database. |
| PUT | Replaces a specified resource with the request payload. |
| DELETE | Deletes a specified resource. |
| CONNECT | Asks the web server to open a tunnel to the requested host. |
| OPTIONS | Asks a web server what HTTP methods/verbs are allowed for the requested path. |
| TRACE | Diagnostic method where the web server will echo back the request’s contents in its response. |
| PATCH | Modifies a specified resource. |
GET and POST Requests
The most common HTTP request methods are GET and POST.
GET
GET requests query data and should never perform actions on a web application. They can be cached or preloaded by a web browser or proxy. Any GET parameters should not contain sensitive information.
To provide parameters to a GET request, you enter them into the URL. For example:
1
https://example.com/page.php?field1=value1&field2=value2&field3=value3
POST
POST requests are used to send or modify data on the web server. They are used for things like login requests, updating and deleting of information, uploading files, and transferring sensitive information. POST requests are not cached or preloaded and do not remain in the browser history.
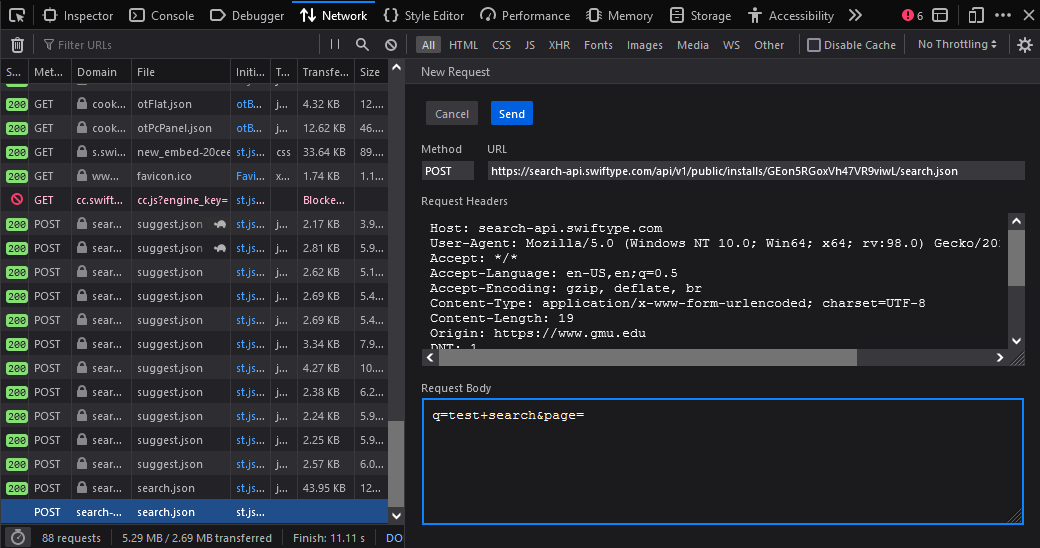
To provide parameters to a POST request, you enter them into the request body, which is the content after the HTTP headers in a raw HTTP request.
POST requests can accept different types of parameters depending on the specified Content-Type. For example:
application/x-www-form-urlencoded (default)
1
2
3
4
5
6
POST /page.php HTTP/1.1
Host: example.com
Content-Type: application/x-www-form-urlencoded
Content-Length: 27

field1=value1&field2=value2
multipart/form-data
1
2
3
4
5
6
7
8
9
10
11
12
13
POST /page.php HTTP/1.1
Host: example.com
Content-Type: multipart/form-data;boundary="12345"

--12345
Content-Disposition: form-data; name="field1"

value1
--12345
Content-Disposition: form-data; name="field2"; filename="example.txt"

This is the content of example.txt
--12345--
Response Status Codes
HTTP response status codes indicate the success or failure of a request. Every HTTP response will contain a status code in the first line of its headers.
1XX status codes are informational. They don’t indicate a failure but also don’t indicate success yet.
2XX status codes mean the request was successful.
3XX status codes tell a client that they are being redirected. This usually means that the client should reach out to a new URL that has been provided in the response.
4XX status codes indicate an error occurred and the client is at fault, such as accessing non-existent web pages or accessing an unauthorized page.
5XX status codes indicate an error occurred and the server is at fault, such as a service being unavailable or an internal error occurred.
Common Status Codes
| Code | Description |
|---|---|
| 100 Continue | Everything is ok, the client should continue their request. |
| 101 Switching Protocols | The protocol is changing, typically used for websockets. |
| 200 OK | Typical status for a normal and successful web request. |
| 206 Partial Content | Sent when a client asked for a particular portion of data, such as a section of a video being watched. |
| 301 Moved Permanently | The requested resource has permanently moved. A Location header should be included with the response specifying where the moved resource is located. |
| 302 Found | The requested resource has temporarily moved. The Location header will specify the temporary location. |
| 304 Not Modified | The requested resource hasn’t changed so the browser can use its cached version. |
| 307 Temporary Redirect | Same as a 302 Found, but the client should use the same HTTP method/verb from their original request in their redirected request. |
| 308 Permanent Redirect | Same as a 301 Moved Permanently, but the client should use the same HTTP method/verb from their original request in their redirected request. |
| 400 Bad Request | The server can’t process the request because the client sent bad information. |
| 401 Unauthorized | An unauthenticated client is not authorized to access the requested resource. |
| 403 Forbidden | An authenticated client is not authorized to access the requested resource. |
| 404 Not Found | The requested resource is not found on the server. |
| 405 Method Not Allowed | The HTTP method/verb is not allowed for the requested resource. This is usually sent when a POST is sent to a GET endpoint or GET sent to a POST endpoint. |
| 429 Too Many Requests | The client has sent too many requests to the server. This usually means that the API being accessed is rate limited. The Retry-After header may say when to try again. |
| 500 Internal Server Error | The server encountered an error when processing the request. |
| 501 Not Implemented | The HTTP method/verb is not supported by the server. |
| 502 Bad Gateway | The internal gateway, such as a reverse proxy, isn’t working. |
| 503 Service Unavailable | The server can’t handle the request at this time. This may be caused by server maintenance or being overloaded. |
| 504 Gateway Timeout | The internal gateway, such as a reverse proxy, timed out when processing the request. |
Editing Requests
Now that you know about HTTP requests, how do you edit them? There are a bunch of great tools for doing this. Burp Suite and OWASP ZAP are great for editing requests and testing websites in general. You can read about them in the tools section. For basic request editing, Firefox Devtools and the curl command-line tool are great for CTFs.
Firefox Devtools
The Firefox Devtools are a great way to edit requests. Press F12 to open the devtools and go to the Network tab. Unlike Chrome Devtools, you can right-click a request and choose Edit and Resend. This allows you to change everything including the method, URL, query string, headers, and body.
Curl
Curl is a command-line utility that you can use to send raw HTTP requests. It’s very useful for CTFs when you need to send a specific request to a website or repeat requests.
GET Request
Get the contents of example.com and output them to the terminal:
1
curl http://example.com/
POST Request
Post the username and password data to a login URL:
1
curl -X POST --data "username=admin&password=123456" http://example.com/login
Download a File
Download a.jpg to a file named a.jpg:
1
curl -O http://example.com/a.jpg
Request Headers
You can also specify headers you want to set:
1
curl -H "User-Agent: CustomUserAgent" -H "Accept: text/html" http://example.com/
Ranges
A useful property of curl for CTFs is you can send multiple requests at once by specifying ranges using {} and []. The following command sends POST requests to the delete_file endpoint for file IDs 1 to 100 and sends it to four different endpoints on example.com for a total of 400 requests.
1
curl -X POST "http://{us,uk,de,fr}.example.com/delete_file?id=[1-100]"
Self-signed SSL/TLS
Often in CTFs, self-signed TLS certificates will be used for web challenges. To make curl ignore SSL/TLS errors, use the -k or --insecure flag:
1
curl -k https://example.org
HTTP Basic Authentication
You might run across a website using basic authentication. This is a simple way for web servers to implement authentication for a website without using any custom login pages. The username and password prompt will come from the browser itself, which then gets added to the HTTP response sent to the server.
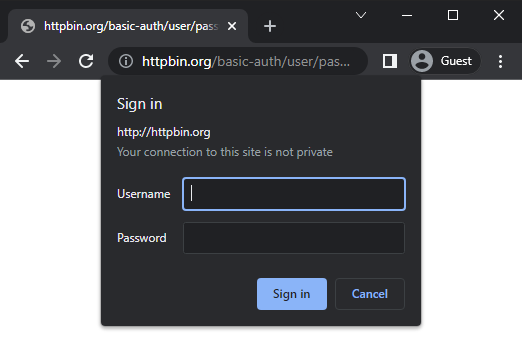
Under the hood, the web server adds a WWW-Authenticate header set to Basic to the response it sends which tells the browser it needs to authenticate. The realm option is added to differentiate which part of the website is being authenticated to. When a user types their username and password, the browser will send an Authorization header set to Basic followed by the username and password in the format user:pass encoded in base64. The browser will cache the authentication and include the Authorization header in subsequent requests to the website so the credentials are remembered.
An important note is that a client can send the Authorization header at any point, it doesn’t need a WWW-Authenticate request from the server first. This allows for sites to “hide” authentication by never requesting authentication, the client must know which pages to manually send their Authorization credentials to.
The following is an example of request and response headers for basic authentication:
1
2
3
4
5
<-- Server Request -->
WWW-Authenticate: Basic realm="admin"

<-- Client Response -->
Authorization: Basic bXl1c2VyOm15cGFzcw==
The bXl1c2VyOm15cGFzcw== in this example decodes to myuser:mypass.
Cookies
Cookies are small pieces of information that a website can store in a web browser. They can be set using the response HTTP headers from a request or by using JavaScript. They are used to store persistent information across HTTP requests (since HTTP is a stateless protocol) and are frequently used for authentication and tracking.
A cookie set using an HTTP response header may look like the following. JSESSIONID is the cookie name and 213DEF... is the value. The Secure and HttpOnly flags are set, the cookie expires on March 24th, and the Path is / meaning the cookie will apply to any page on the website.
1
Set-Cookie: JSESSIONID=213DEF0606AE11A; Expires=Thu, 24 Mar 2022 23:33:04 GMT; Path=/; Secure; HttpOnly
To access cookies using JavaScript, the document.cookie command can be used. To set a new cookie, you can set document.cookie to a string with the new cookie. For example:
1
2
3
4
5
6
7
8
document.cookie
'JSESSIONID=213DEF0606AE11AEFB41076602D93A66'

document.cookie = "NewCookie: NewValue"
'NewCookie: NewValue'

document.cookie
'JSESSIONID=213DEF0606AE11AEFB41076602D93A66; NewCookie: NewValue'
HttpOnly Flag
Cookies with the HttpOnly flag can only be set and accessed using HTTP response headers. JavaScript cannot be used to read or set the cookie, and it will be excluded from the document.cookie output. This helps protect against XSS attacks because any malicious JavaScript running in the browser won’t be able to access the cookies. All authentication/session cookies should have this flag set, so if you see an auth cookie lacking this flag in a CTF challenge, it may be part of an XSS challenge.
Secure Flag
Cookies with the Secure flag will only be sent over HTTPS connections. This means if a page is loaded as HTTP, the cookies will not be sent. This helps prevent eavesdropping if an attacker performs a downgrade attack since the cookies would appear in plaintext if sent over HTTP.
SameSite Flag
The SameSite flag helps prevent CSRF attacks. It can be set to three values: Strict, Lax, or None.
Strict tells the browser to only send that cookie when the web request originates from the same site that set the cookie. In other words, if a cookie is set for example.com, and a user is on test.com and the test.com page sends a request to example.com, the request will not contain the cookie.
Lax applies the same Strict rules but only when the request is unsafe, such as a POST request. GET requests will still send the cookie because they are considered safe.
None is the default value and tells the browser it can send the cookie no matter which website the request originates from.
robots.txt
The robots.txt file tells search engines which files and directories to ignore when indexing the site. It is located in the root of a website, such as https://example.com/robots.txt. For CTFs, looking for interesting paths in robots.txt is useful for enumerating what paths exist on the web server. Often, paths that are supposed to be hidden will be listed in the robots.txt file so that web crawlers don’t index it, which makes it even more interesting to investigate in a CTF. The robots.txt file may also include a link to a sitemap. This may be useful for enumeration as it will include a list of all the pages on a site. An important note is that crawlers are under no obligation to follow rules in the robots.txt, however respectable crawlers like Googlebot generally do.
In this example robots.txt, the Google and DuckDuckGo crawlers are allowed to crawl the entire site, the MSNBot is not allowed to crawl /secret, and all other bots are not allowed to crawl any part of the site. A sitemap is also made available.
1
2
3
4
5
6
7
8
9
10
11
12
13
User-agent: Googlebot
Disallow:

User-agent: DuckDuckBot
Disallow:

User-agent: msnbot
Disallow: /secret

User-agent: *
Disallow: /

Sitemap: https://www.example.com/sitemap.xml
Wildcards can also be applied to the robots.txt rules. The following example disallows all crawlers from indexing pages under the /secret/ path and JPG files in any part of the website.
1
2
3
User-agent: *
Disallow: /secret/*
Disallow: /*.jpg$
Virtual Hosts
Virtual hosts allow a single web server with a single IP address to host multiple websites. For example, a single server could host different websites on the domains example.com and example.test. Since requests to both domains will be going to the same port on the server, the server can differentiate between the two using the HTTP Host header. This header will always be set to the domain name of the site a user has requested.
For example, browsing to https://www.gmu.edu in a web browser will automatically add the HTTP header:
1
Host: www.gmu.edu
In CTFs, if you are given access to a website and find an additional domain name that you aren’t able to access (such as it doesn’t resolve to any IP address) then you might try modifying the Host parameter in the legitimate websites’ request to the new domain name. You could also perform enumeration or brute-forcing against the Host header to search for other domains that may be available.
SSL/TLS Certificates
TLS certificates provide a lot of information about a website and are a great tool for reconnaissance. In Chrome, you can view the TLS certificate of a website by clicking on the lock icon, and either clicking Connection is secure followed by Certificate is valid or clicking Certificate is not valid if the TLS connection has an error.
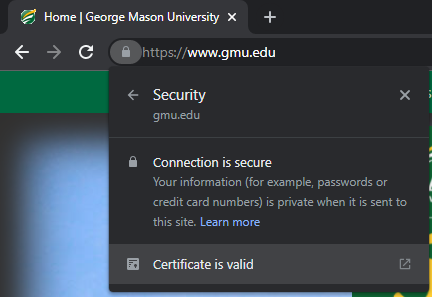
From here, you can view the details of the certificate including the issuer and valid dates.
The Certification Path tab shows the chain of certificates that were used to sign the website’s certificate. This will often include a root CA cert and an intermediate CA cert.
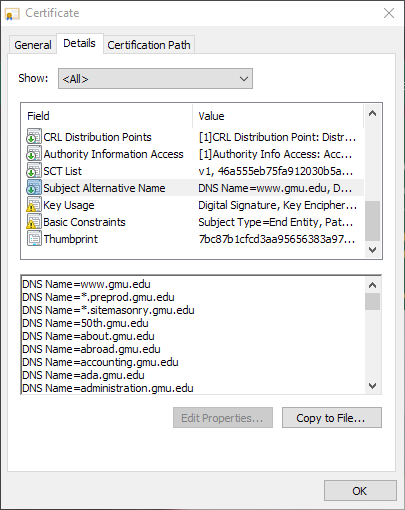
The Details tab shows the detailed information about the certificate. You can view the name, organization, state, and country of the issuer and subject.
Importantly, you can view the Subject Alternative Name (SAN). The SAN lists other domain names and IP addresses that the certificate is valid for. This is great for reconnaissance as you can frequently enumerate different subdomains that are hosted on the web server. For example, here is part of the SAN list for gmu.edu:
Vulnerabilities
The following describes some common web vulnerabilities you may encounter and how to exploit them. The list is not exhaustive but gives an overview of many common vulnerabilities. Most vulnerabilities described here will include a link to a PortSwigger lab where you can try to exploit it yourself. Do note that you need to sign up for a free account before accessing the labs.
Directory Traversal
Directory traversal is a vulnerability in the way a web server or application handles paths. It allows an attacker to read arbitrary files from the web server. The best way to understand this is through example.
Let’s say a website allows file uploads. When accessing an uploaded file, the site uses this format: http://example.com/uploads.php?file=hello.txt. Because we know that hello.txt probably exists as a file on the server, we can try to perform directory traversal. By specifying a different path, we may be able to access other files. We can also go up directories to the root of the filesystem by sending a large sequence of ../ before a file path. For example, we could browse to http://example.com/uploads.php?file=../../../../../etc/passwd and receive the /etc/passwd file.
Why would a vulnerability like this occur? This is largely dependent on the backend program that is running. In our example, a PHP file named uploads.php is used to read the file from disk and send it back to the requester. The code to read the file might naively look like the following:
1
file_get_contents("uploads/" . $_GET["file"])
The file GET parameter is being accessed and appended to uploads/, a folder on the system where the files are uploaded. Because the input isn’t being checked, we can specify any arbitrary string to get appended to uploads/. In our example, the PHP code would effectively become:
1
file_get_contents("uploads/../../../../../etc/passwd")
This path gets simplified to just /etc/passwd and the PHP function returns the contents.
Try this vulnerability: Simple path traversal lab
All directory traversal labs: PortSwigger labs
Cross-Site Scripting (XSS)
Cross-site scripting occurs when malicious JavaScript is injected into a website. This happens when an attacker gets a web browser to run JS code that the website did not intend to. This allows an attacker to impersonate a user, performing actions and sending requests from a page on a website that the user may be signed in on. XSS can also be used to manipulate a webpage once it’s loaded, such as for a phishing attempt.
There are two main categories of XSS vulnerabilities: reflected and stored.
Reflected
Reflected XSS occurs when the request to the website itself contains the malicious script that exploits an XSS vulnerability. It is not persistent, meaning to exploit the XSS vulnerability, each request has to contain the script, and a normal user browsing around the site will most likely not encounter malicious code. Often, someone will fall victim to a stored XSS attack when they click a link sent in an email or a link posted on social media. Most often, the XSS payload will be in the GET parameters of the URL. However, other fields could also be used, such as POST parameters, form data, HTTP headers, and cookies.
For example, let’s say there is a search page on a website. When you enter a search term, the page inserts your search term into the page like the following:

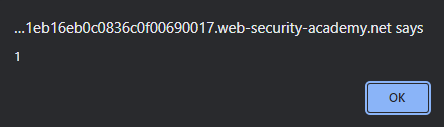
Looking at the URL, the search term is part of the GET parameter query. If this query parameter is being directly pasted into the page contents without any sanitization, it’s possible to include any arbitrary HTML. The payload <script>alert(1)</script> will cause an alert box to open in the web browser. If you put that in the search box on the website, the GET request URL might look like the following:
1
/search.php?query=<script>alert(1)</script>
The backend processes the request and pastes the entire query text into the page, which executes the script and causes an alert box to open.
An excerpt of the HTML can be seen below where the script tag was inserted:
1
2
3
4
5
6
...
<section class=blog-header>
    <h1>0 search results for '<script>alert(1)</script>'</h1>
    <hr>
</section>
...
This can be further expanded to contain any arbitrary code that an attacker (or CTFer) might want, and the link to the page can easily be shared.
Stored
Stored XSS is a vulnerability where a website includes untrusted code in the response page. Unlike reflected XSS, stored XSS code is persistent and saved to the website itself. A user does not need to click on a special link that contains the code in the URL. Instead, the vulnerability may have been in a user comment field or a social media post where the malicious JavaScript is stored on the backend such as in a database. An innocent user browsing around a site may encounter stored XSS without being directed to a specific link.
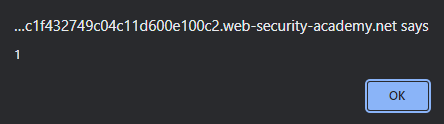
For example, let’s say a blog website has a comment field. The field doesn’t do any sanitization or verification. Like in reflected XSS, we can insert some HTML into the comment with the payload <script>alert(1)</script>.
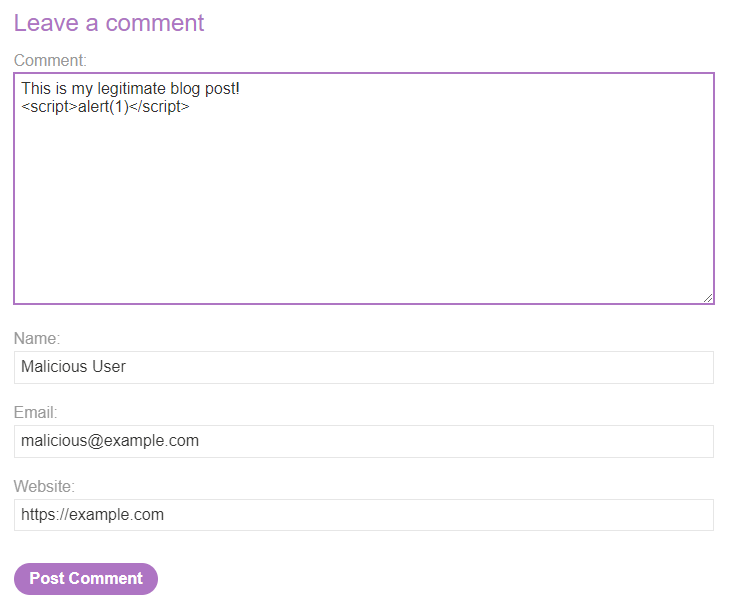
Now, anytime someone visits that post on the blog, the JavaScript is executed and the alert is shown.
An excerpt of the HTML can be seen below where the script tag was inserted:
1
2
3
4
5
6
7
8
9
10
11
12
...
<section class="comment">
    <p>
        <img src="/resources/images/avatarDefault.svg" class="avatar">
        <a id="author" href="https://example.com">Malicious User</a> | 26 March 2022
    </p>
    <p>
        This is my legitimate blog post!
        <script>alert(1)</script>
    </p>
</section>
...
Prevention
To prevent XSS vulnerabilities, you should always sanitize user-generated inputs. For stored XSS, this means sanitizing them before saving them to a database, and for reflected XSS, sanitizing them before displaying them on a page.
Try this vulnerability: Reflected XSS lab, Stored XSS lab
All XSS labs: PortSwigger labs
Cross-Site Request Forgery (CSRF)
Cross-site request forgery, abbreviated CSRF (sea-surf) or XSRF, is a vulnerability that occurs when an attacker causes a victim to send an unintended request to another website. This can cause consequences for the user if they are logged into the other site.
For example, let’s say that bank.com uses POST requests to transfer money between accounts. The URL endpoint may look like https://bank.com/transfer?from=alice&to=bob&amount=10.
Now let’s say Alice is logged in to bank.com and then browses to evil.com. When evil.com loads, it sends a POST request in Alice’s web browser to the bank.com transfer endpoint, specifically https://bank.com/transfer?from=alice&to=oscar&amount=1000. Without any protection, the Oscar account will be sent $1000 from Alice’s account without her immediately knowing what happened.
In another example, let’s say there’s a website with an account system and the ability to change the user’s email address. The API endpoint that handles the email change doesn’t have any CSRF protection. A malicious user who wants to change the administrator user’s password can trick the admin to visit a website the attacker runs. On load, the website automatically sends a request to the account website to change the administrator email, and the request would be successful because the admin is already signed in so the request will include a valid authentication cookie.
The attacker’s website may look like the following:
1
2
3
4
5
6
<form method="POST" action="https://example.com/my-account/change-email">
    <input type="hidden" name="email" value="[email protected]">
</form>
<script>
    document.forms[0].submit();
</script>
Without knowing, the administrator’s email address has been changed to the attacker’s email address. This could then be used to send a password reset link and fully steal the account.
Prevention
To prevent CSRF, many websites use CSRF tokens. For each sensitive or authenticated request, a nonce (a random value) is generated and placed on the page that sends the legitimate POST request, such as bank.com’s transfer page. When the legitimate page is used to send the POST request to the transfer endpoint, the nonce is included in the request and verified by the server. If a malicious website causes a user to send a request to one of these sensitive endpoints, a nonce won’t be sent because the malicious website has no way of generating a legitimate nonce to send.
Another (somewhat debated) way to prevent CSRF is by setting authentication cookies with the SameSite=Strict attribute. This means that the cookie is only included on requests made from pages on the same site that set the cookie. In other words, the browser would not send the cookie in a POST request sent to bank.com from a malicious website or any website other than bank.com.
Try this vulnerability: CSRF lab
All CSRF labs: PortSwigger labs
SQL Injection (SQLi)
Be sure to review the SQL Primer if you’re unfamiliar with SQL syntax before reading on about SQLi.
SQL injection, often abbreviated as SQLi, is the execution of unintended SQL queries on a computer. This is often caused by not effectively sanitizing user input before the backend server sends a request to the database. The primary vulnerability behind this is that in many languages, you can build SQL queries as strings and then execute those strings against the database. With SQLi, an attacker can break out of the standard SQL query that was prepopulated. There are countless premade payload lists that can be used to test for SQLi vulnerabilities.
The pseudocode for a backend application that runs a database query may look like the following:
1
run("SELECT * FROM users WHERE user = '$username' AND pass = '$password'")
The $username and $password variables hold the credentials a user specifies in the login form. Now, what happens if a user submits the login form where they entered the username administrator and the password ' OR 1=1 --? This expands the query to the following:
1
run("SELECT * FROM users WHERE user = 'administrator' AND pass = '' OR 1=1 --'")
Above, you can see that administrator is specified like normal. However, the password is now being compared to the empty string ''. Furthermore, an OR 1=1 is added which, combined with the AND pass..., effectively asks for a row in the users table where the user column is administrator and either the pass column is empty or 1=1. Since 1=1 always returns true, this ignores checking for the password, and the administrator row will be returned, logging the user in. At the end of the query, -- is added which comments out anything else in the query. This is added in case there is any other logic included in the query that may have been messed up now that the query was changed.
This just scratches the surface of SQLi. Besides bypassing logins, you can download entire copies of the databases, destroy data, or run arbitrary code.
Blind SQLi
Sometimes when trying to exploit a potentially vulnerable website, it is difficult to tell whether there is a SQLi vulnerability and gain information from it. This is referred to as blind SQL injection, where you have to exploit a website without easily being able to tell your progress. There are a few different approaches to doing this. One of the most common is using timing to obtain information. By adding a delay command (these vary by DBMS), you can effectively determine if a query succeeds or fails by combining this with a command like IF.
Sqlmap
Blind SQL injection often takes a lot of time and SQLi injection in general can involve a lot of guesswork. The solution for this is to use a tool called Sqlmap. Sqlmap can perform regular and blind SQL injection automatically for various DBMSs (which are automatically detected by the tool).
Prevention
There are two main ways to prevent SQLi, sanitization and parameterization.
Sanitization
With sanitization, you clean user input before inserting it into a SQL statement. This is how SQLi has been traditionally prevented. However, there can be some edge cases if the input sanitization is not 100% effective.
Parameterization
With parameterization, the user input parameters are sent to the database as an additional part of the query, rather than being inserted into the query string. The database will then combine the query and parameters into the final query. This is the preferred method for preventing SQLi since there is less room to make a mistake.
Try this vulnerability: SQLi lab
All SQLi labs: PortSwigger labs
NoSQL Injection
Similar to traditional SQL injection, NoSQL injection involves executing unintended NoSQL queries. While SQLi usually exploits the way queries are built using strings that are passed to the DBMS to be executed, NoSQL injection is often achieved by affecting the language a web application is programmed in. The best way to describe this is with an example.
In PHP, a MongoDB query to authenticate a user may look like the following:
1
2
3
4
$collection->find(array(
'user' => $_GET['user'],
'password' => $_GET['password']
));
This checks for documents in the collection where the user field is equal to the user GET parameter and the password field is equal to the password GET parameter. The GET parameters are supplied by the user with their username and password to log in (note that in a proper setup, POST parameters would be used instead of GET, but this is a useful example). A quirk of the PHP language is that URL (GET) parameters can not only be regular strings, but also associative arrays. You can specify this by using square brackets after the variable name. For example:
1
user=admin&password[bar]=foo
This makes $_GET['password'] an associative array, with bar being the key and foo being the value. The using print_r($_GET['password']) to show how PHP interprets the GET parameters from above, the structure is the following:
1
Array ( [bar] => foo )
Now going back to MongoDB, the documentation shows how to perform a “not-equal” operation (similar to a SQL NOT) using $ne in the syntax: { field: { $ne: value } }. So now we can change the GET parameters to the following:
1
user=admin&password[$ne]=foo
And effectively changes the PHP NoSQL query to the following:
1
2
3
4
$collection->find(array(
'user' => $_GET['user'],
'password' => Array ( [$ne] => "foo" )
));
Now this searches the NoSQL collection for a user with a user-specified username and a password that does NOT match the user-specified password, which effectively makes it so we can log in to any account we want.
This same concept can be applied to JSON requests to a server, such as {"username": "admin", "password": {"$ne": "foo"} }. This is a more likely scenario for a login request.
There are many different ways to perform NoSQL injection based on the payload, DBMS, and backend language. A good reference is available on HackTricks.
Command Injection
Command injection is a relatively easy vulnerability to understand on the surface level. Often when building a web application, rather than calling or interfacing with an API to retrieve data, the developer may run an OS command-line tool and use the output. For example, let’s say there is a down detector service that sends an ICMP ping to an IP address to determine if a website is up or not. The PHP code for it is the following:
1
2
3
4
<?php
$output = shell_exec("ping -c 4 " . $_GET["ip"]);
echo "<pre>$output</pre>";
?>
When browsing to the URL ping.php?ip=8.8.8.8, the command ping -c 4 8.8.8.8 is run in the server’s shell and the following output is displayed:
1
2
3
4
5
6
7
8
9
PING 8.8.8.8 (8.8.8.8) 56(84) bytes of data.
64 bytes from 8.8.8.8: icmp_seq=1 ttl=128 time=10.5 ms
64 bytes from 8.8.8.8: icmp_seq=2 ttl=128 time=12.9 ms
64 bytes from 8.8.8.8: icmp_seq=3 ttl=128 time=5.24 ms
64 bytes from 8.8.8.8: icmp_seq=4 ttl=128 time=8.43 ms

--- 8.8.8.8 ping statistics ---
4 packets transmitted, 4 received, 0% packet loss, time 3005ms
rtt min/avg/max/mdev = 5.243/9.263/12.877/2.804 ms
This shows that the host is up, and is simple enough that this solution may have been deployed to a real website. Do you see the problem? Like in other vulnerabilities, the $_GET["ip"] variable is controlled by the user. In the above example, it was set to 8.8.8.8, but this can be changed to anything. What if the user enters the following?
1
2
3
ping.php?ip=8.8.8.8; cat /etc/passwd

(this encodes to: ping.php?ip=8.8.8.8;%20cat%20/etc/passwd)
Now, the shell command being executed is:
1
ping -c 4 8.8.8.8; cat /etc/passwd
Now the request returns:
1
2
3
4
5
6
7
8
9
10
11
12
13
14
15
16
17
PING 8.8.8.8 (8.8.8.8) 56(84) bytes of data.
64 bytes from 8.8.8.8: icmp_seq=1 ttl=128 time=5.24 ms
64 bytes from 8.8.8.8: icmp_seq=2 ttl=128 time=7.69 ms
64 bytes from 8.8.8.8: icmp_seq=3 ttl=128 time=9.49 ms
64 bytes from 8.8.8.8: icmp_seq=4 ttl=128 time=12.1 ms

--- 8.8.8.8 ping statistics ---
4 packets transmitted, 4 received, 0% packet loss, time 3006ms
rtt min/avg/max/mdev = 5.235/8.635/12.125/2.518 ms
root:x:0:0:root:/root:/usr/bin/zsh
daemon:x:1:1:daemon:/usr/sbin:/usr/sbin/nologin
bin:x:2:2:bin:/bin:/usr/sbin/nologin
sys:x:3:3:sys:/dev:/usr/sbin/nologin
sync:x:4:65534:sync:/bin:/bin/sync
games:x:5:60:games:/usr/games:/usr/sbin/nologin
man:x:6:12:man:/var/cache/man:/usr/sbin/nologin
...
The contents of /etc/passwd are included. This can be extended and you can run virtually any command.
Things become more complex when the command input is partially sanitized or the output from the command is never displayed and you need to guess if the output was successful (this is called blind command injection).
Prevention
To prevent command injection, there are three main methods.
-
OK: Escaping shell characters before running a command. In this prevention method, you use a premade method (such as PHP’s
escapeshellcmdandescapeshellarg) to remove or escape any dangerous characters that could be used to break out of the command (such as;in the earlier example). This can never be 100% effective so this isn’t a great solution. -
Better: Parameterizing arguments passed to a command. Instead of running a shell command as a full string, you can parameterize each argument of the command into an array. The operating system can execute this safely without characters like
;being used to break out of the original command’s execution. However, this does not prevent abusing the individual arguments sent to the command and a user could still cause harm to the system. -
Best: Not using shell commands at all. There are plenty of ways to interact with the operating system using APIs and libraries in the web app’s programming language that you really shouldn’t need to use shell commands. And if you really need to run a shell command, don’t run it with any user-modifiable input.
Try this vulnerability: Command injection lab
All command injection labs: PortSwigger labs
Server-Side Request Forgery (SSRF)
With server-side request forgery (SSRF), you trick a web server into accessing an internal URL or a URL that the server is pre-authorized to access. For example, the web server may access an internal server when processing a request. Because the server was supposed to be internal, there is no built-in authentication. Using an SSRF vulnerability, we can access this internal server.
A very noteworthy example of an SSRF vulnerability is in the 2019 Capital One data breach (read the full details about how the SSRF vulnerability worked in the link). In a simplified version of this breach, the attacker sent a request to the AWS EC2 metadata service. This is an internal service accessible to Amazon Web Services EC2 instances where they can receive metadata about themselves, as well as request access tokens for which the instance is authorized and can use those to access other resources.
This metadata service was located at the standardized URL: http://169.254.169.254/latest/meta-data/iam/security-credentials/ISRM-WAF-Role. The 169.254.169.254 IP address is for the metadata service and is common among all EC2 instances. The vulnerability in the breach allowed the attacker to access that URL, get an access token, and use the token to access other AWS resources and steal data.
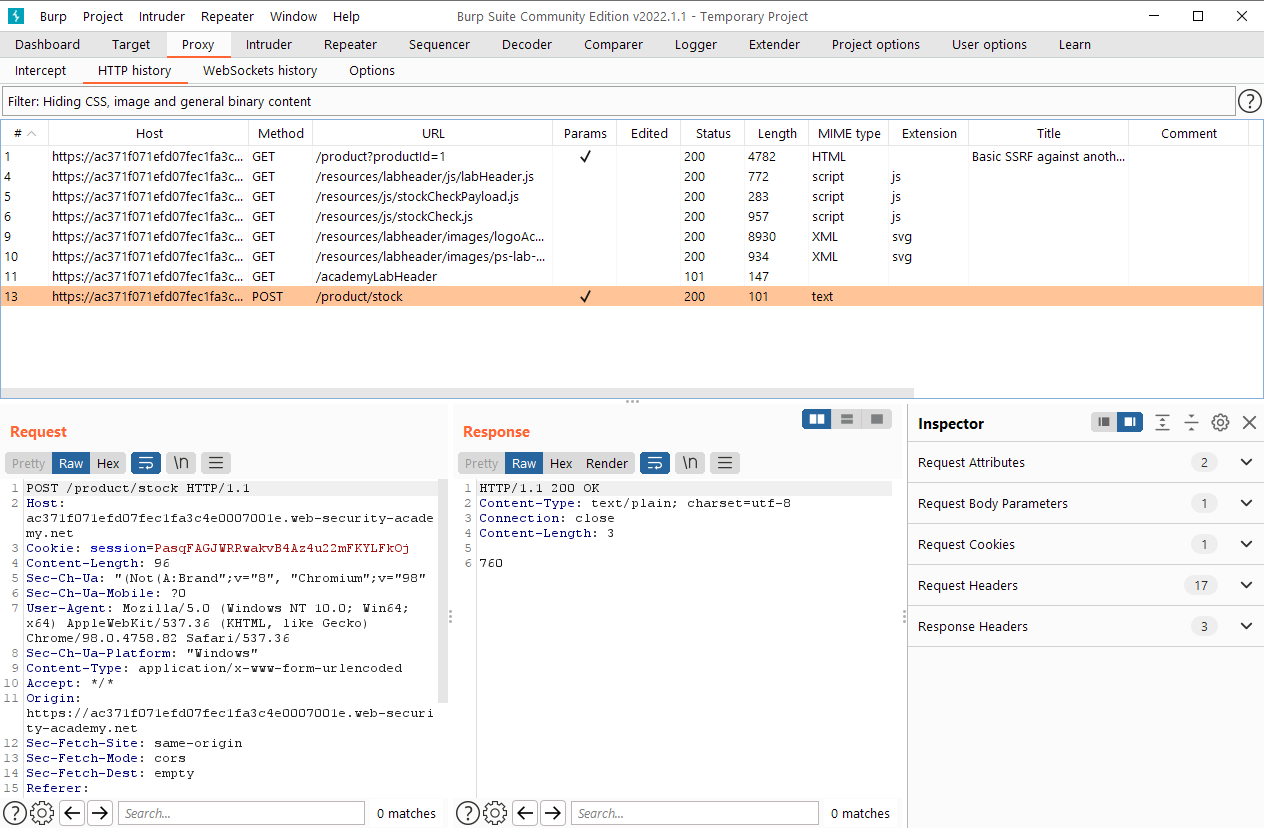
In another example (from the PortSwigger labs), let’s say there is a function to check stock for an item in an online store. The request payload includes a stockApi parameter set to http://192.168.0.1:8080/product/stock/check?productId=4&storeId=1. It can be inferred that the web server is sending a request to that IP address and URL and that it is authorized to access it. By changing this IP address, we can scan around the internal network and potentially find other services and devices.
Prevention
To prevent SSRF vulnerabilities, you should never allow a user to control which URL a web server may access. For services that do use user input in this way, like a web scraping service for example, the user input should be properly sanitized so that the user cannot unintentionally change the URL.
Try this vulnerability: SSRF lab
All SSRF labs: PortSwigger labs
XML External Entity Injection (XXE)
XML external entity injection (XXE) occurs when a web server uses XML for its API requests and the server is overly trusting of the input. When the XML standards are followed and the server doesn’t restrict what elements of XML are processed, a user can define custom XML entities that perform dangerous actions, such as accessing files.
An example XML payload that could trigger an XXE injection is the following:
1
2
3
4
5
<?xml version="1.0" encoding="ISO-8859-1"?>
<!DOCTYPE foo [
  <!ELEMENT foo ANY >
  <!ENTITY xxe SYSTEM "file:///etc/passwd" >]>
<foo>&xxe;</foo>
In this example, the relevant parts are that we define a custom DOCTYPE starting in line 2, and inside that, we define a custom element, foo, in line 3. This allows us to define a custom entity xxe in line 4, which retrieves a local file and stores its content inside the xxe entity. Finally, we need to use the custom entity. In line 5, we use the custom foo element and then get the value of the entity with &xxe;. This whole XML document results in the contents of /etc/passwd on the server being injected into the XML. If the request has other elements already in use, you don’t even need to define a new element in line 3 and can just insert the custom entity into the existing element.
Prevention
The best way of preventing XXE is to not use XML at all, and switch to a safer format like JSON. Alternatively, use an XML parsing library that is restrictive and doesn’t allow for XXE. As of 2022-05-04, the Python untangle library still has an open issue about XXE injection, so the vulnerability does still exist in modern applications.
Try this vulnerability: XXE lab
All XXE labs: PortSwigger labs
Tools
Below are just a few tools that you can use while performing web exploitation.
Dirbusting
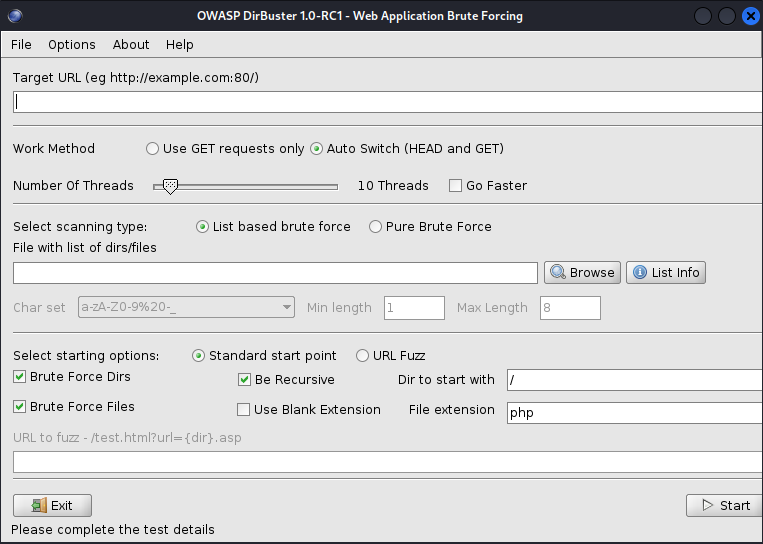
Dirbusting is the process of scanning a website for directories, files, and subdomains by brute-forcing their names, usually using a wordlist. You can find some including wordlists in Kali in the /usr/share/wordlists/dirbuster, /usr/share/wordlists/dirb, and /usr/share/wordlists/wfuzz directories. This is a very noisy and overt process, so you should never dirbust if you need to stay stealthy. Many dirbusting tools have been created:
This is the O.G. dirbusting tool. It has a GUI, so if you aren’t comfortable with the command line, this may be your best option. However, the tool is relatively dated and hasn’t been updated in a LONG time. It is also slower than some of the other newer options.
Dirb is a new(er) tool than Dirbuster, but still hasn’t been updated in a while. I would recommend one of the tools below instead.
Gobuster is written in Go so it is fast and has great concurrency. It can do directory, subdomain, S3 bucket, and virtual host brute-forcing.
ffuf is also written in Go so it is fast and concurrent. It has colorful and easy-to-read output and lets you easily fuzz specific parts of URLs. That makes it especially useful for fuzzing intermediary directories or GET parameters. It can also fuzz POST requests. More documentation can be found here.
Wfuzz is written in Python and can be used as both a CLI tool and a library in Python for advanced fuzzing options. It also has a payload generator, wfpayload. Like ffuf, it can fuzz specific parts of URLs and parameters. Wfuzz can also fuzz HTTP headers, cookies, and HTTP verbs.
Dirsearch is written in Python like Wfuzz. It has colorful output and plenty of configuration options for fine-tuning.
Overall, I would recommend using either ffuf, Wfuzz, or Dirsearch.
Burp
Burp Suite is a general web exploitation tool. It can act as an HTTP proxy and can do things like:
- Spider websites to obtain their structure
- Edit in-flight requests
- Repeat and change requests
- Brute-force and fuzz requests
Burp isn’t open-source, so some features like brute-forcing are slowed down or limited. ZAP is a great alternative, however, Burp is much more user-friendly.
OWASP ZAP
ZAP shares a similar feature set to Burp, however it is open source and without limitations. You can fuzz requests at full speed and perform active spidering using a headless web browser. ZAP also has a heads-up display (HUD) which is shown in the proxied web browser while you navigate the website. This makes it easy to find vulnerabilities, repeat requests, and find hidden form fields.

Other Tools
Other extremely useful tools that I won’t describe in detail here are:
- HTTP Proxies
- Network Analysis
- Wireshark
- NetworkMiner
- Nmap (network mapper)
- Vulnerability Scanning
Practice and Labs
Labs
The PortSwigger Web Security Academy (the creators of Burp Suite) has some excellent labs where you can practice most of the web vulnerabilities described above and more. You need to sign up for a free account and can then access the labs. You can access them here. There are plenty of other detailed resources on the site that describe web vulnerabilities and exploitation.
GMU Students
If you’re a GMU student, join Mason Competitive Cyber Club and register for our training CTF platform TCTF. The link is available on our website. We have some practice web exploitation problems you can try. If you having trouble or need a hint, you can always ask for help in our Slack.
The challenges I created are under the “Web” category on TCTF.
Easy:
- Hidden In Plain Sight
- PETAIR
Medium:
- BigBusiness
- Secure Server
- Calculator-as-a-Service
Hard(er):
- Room Finder
- Ephemeralcoin
- Juggling (not created by me)